Winter is just around the corner, and you know what that means: scarf season!
Yes, one of the best parts of winter’s arrival is my favorite style basic: scarves. They’re easy to throw on and a definite staple for fall. Problem is, scarves cost money, so being the economically responsible person I am, I decided to whip up not one but TWO scarves from one shirt, and best of all, they’re FREE!
So do you know what time it is? That’s right- get your scissors out, girls: it’s DIY time! I’m going to show you how to make a fringed scarf AND a tube scarf from one t-shirt, all for $0 dollars. Eat your heart out, American Apparel.
Table of Contents
What You Need:

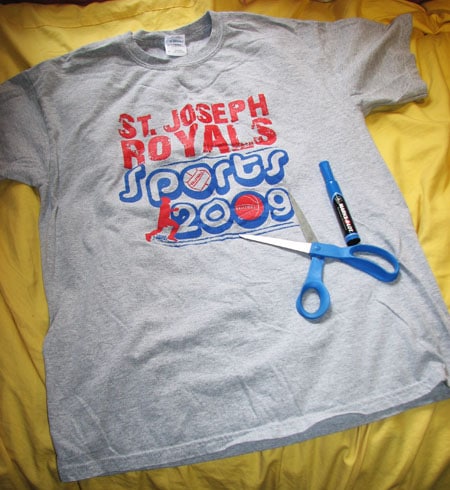
1. An oversized, old, and/or unwanted t-shirt
2. A marker (or something to make marks with)
3. Scissors
How to Make the Fringe Scarf
Step 1:

Take the shirt of your choosing and turn it so the side you want to be visible is on the inside.
If you want to hide the decal or whatever, make sure the decal is on the outside and vice versa. However, I just want to make a note that if you use a shirt with a design on it, the design colors will probably become visible one way or another because the fringe will flip sometimes. So If you want a solid colored fringe scarf, use a shirt with no design on it.
Step 2:

Measure out about 10 or so inches and make a mark in the center of the shirt. Then make a mark on each side of the shirt about one inch above the bottom of each shirt sleeve. Connect all three dots in an arch-like shape (see above).
Step 3:

Cut off the shirt sleeves. (This makes it easier to cut out the scarf shape.)
Step 4:

Cut along the arched line you drew earlier and pull apart. (Make sure you cut both layers!) Put the bottom half aside (we will use it later).
Step 5:

Make a mark under the center of the neck hole and then measure about an inch away from both ends of the neck hole and make two other marks. After you make the marks, connect them by drawing another arch. (Don’t stress, it doesn’t have to be perfect, it’s going to be round no matter what.)
Step 6:

Cut along the arch line you drew and pull apart.
Step 7:

Starting at the center, cut a straight line until you get to about half an inch away from the top of the fabric. (Make sure you are cutting both the bottom and the top layers.) Then measure about 2 centimeters to the left or right and cut another line. Repeat this until you get the whole piece of fabric looking like the above picture.
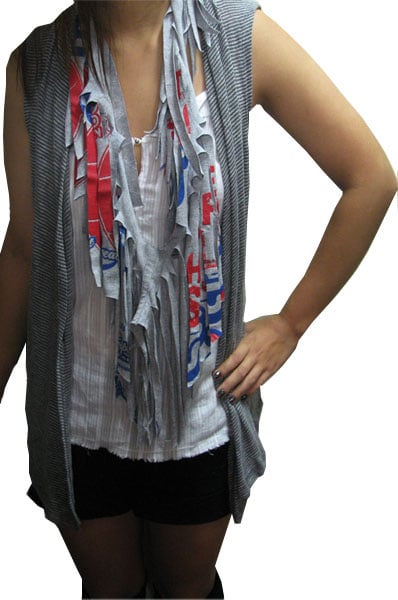
Voila! Scarf 1 Complete!
It should look something like this:

My scarf has lots of colors because the inside of the shirt I used had red and blue designs on the shirt.
I really like it – it’s very Parisian. However, if you want your fringe scarf to be one solid color, try and find a shirt with no design on either side in the color of your choosing, or get creative and experiment with shirts with different patterns.
How to Make the Tube Scarf:
Step 1:

Take the remnants of the bottom half of the shirt. (The part I told you to put aside.) Draw a straight line across, then cut along the line.
Step 2:

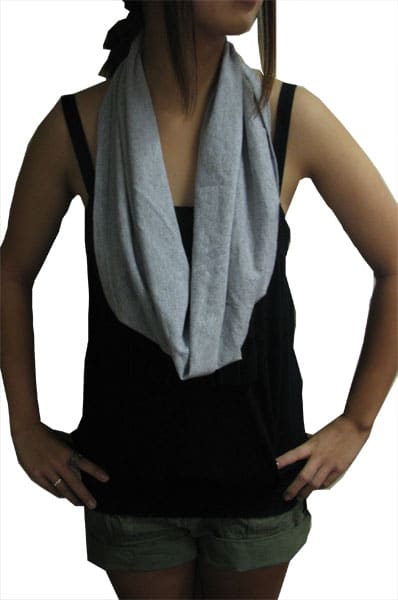
Pull apart the two fabrics. Yay, scarf 2 is completed!
It should look something like this:

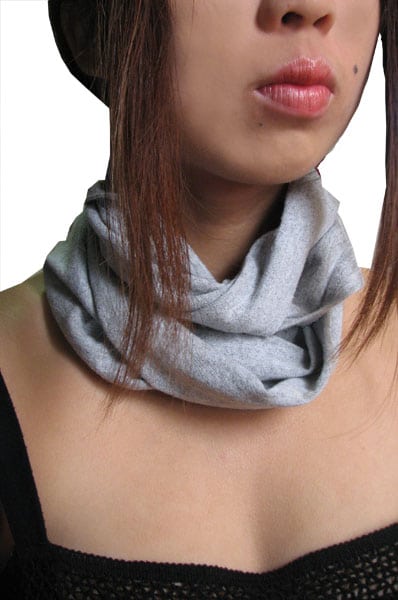
Or you can wrap it twice around your neck like this:

There you have it – two scarves from one t-shirt!
And just to give you some perspective, did you know that American Apparel’s circle scarf, costs a whopping $37 dollars?! Meanwhile Urban Outfitter’s similarlystyledfringescarves range from 30-40 dollars. I love my AA and UO as much as the next girl, but $30+ dollars for a scarf? I think I’ll pass- especially when you can make the exact same thing in 5 minutes and for free!
Honestly, this DIY is so easy, and versatile, I don’t know why you wouldn’t want to do try it out. You can experiment with so many patterns and designs – I get excited just thinking about the possibilities.
Your Thoughts?
What do you guys think? Did you like this tutorial? Are you gonna be rocking your DIY scarves proudly? Let me know in the comments!

More DIY posts please. Expanding my wardrobe without killing my bank account is so much fun! I’ve been eying tube scarves in stores but didn’t want to spend that much on one (I have so many scarves already!). Now my new, free one is my favorite fall accessory.
It even inspired me to DIY a warmer version to wear once colder weather hits. I was just going to use your idea but with a sweatshirt instead of a T, but couldn’t find an appropriate one. Instead I bought a yard of thicker fabric, cut a big strip of it (so I had 36×20-ish inch rectangle) and sewed both ends together. It took only too a few minutes and cost $4.
Very simple, but very interesting tutorial! I’m excited to try this out.
You make your new fringe scarf look effortless and chique.
My new fringe scarf looks like I just cut up an old t-shirt.
Great ideas… I guess I’m just not that creative!
I.LOVE.THIS! I am going to try this today. Thanks for the post! Lets see some more DIY!
cool idea ~ i’m gonna make one too~
wow, kim! i love it!
you’re such a genius. 🙂
I love this! I can’t wait to try it. I wear scarves all the time and this was perfect for winter. I would love to see more DIY posts, too! Especially ones involving old articles of clothing.
Kimmi, this is really great. Time to DIY it up today, thanks!
Keep the blogs coming sweet thang.
This is seriously SO cool Kim! I love it! What a great idea!
I’m am in awe… How did you think of this?! They’re absolutely gorgeous! Thanks to you, I’ll be able to transform my boring outfits into something really cute!
Love the idea. I am going to try it with many different shirts i don’t use. You should do more DIY post.
love love love! awesome idea. more diy stuff please!
super cute! i just made a fringe scarf i love it
i really like DIY. here is a link to a great blog about it, sometimes the ideas are a bit crazy, but i mostly use it for inspiration http://www.lovemaegan.com
I really love your blog, it helped a lot in the last weeks.
Can´t you do more DIY tutorials?
Yes, yes, and yes.
Looks like I now have something to do this sunday!