Any college girl knows that it can be a challenge to stay stylish without breaking the bank. But our DIY Chic column is here to bring College Fashion readers budget-friendly and easy do-it-yourself projects. If you are looking for more DIY inspiration, take a look at our past tutorials on making a multi-strand statement necklace, bow hair accessories, flower hair clips, a printed word scarf, transforming a pair of old jeans, recreating an old or thrifted item, or creating a pair of cap-toe flats.
Whether you are updating a recent thrift store find or just want to alter your favorite skirt, dress, or pair of pants, shortening a hemline is one of the quickest ways you can mix up a garment. This week, we are bringing you a quick and easy tutorial on shortening and sewing a hemline by machine – or by hand, if you prefer! (If you want a quick fix in a pinch, see our tutorial on no-sew hemming.)
Don’t worry, it’s a lot easier than it might sound. Take a look at the step-by-step process below:
Table of Contents
What you’ll need:
- A too-long garment for hemming
- A sewing machine OR needle and thread in a matching color
- Fabric scissors
- Measuring tape
- Pins
- Washable fabric, chalk, or pencil for marking
- An iron and ironing board – probably not a necessity, but very helpful
The step-by-step process:
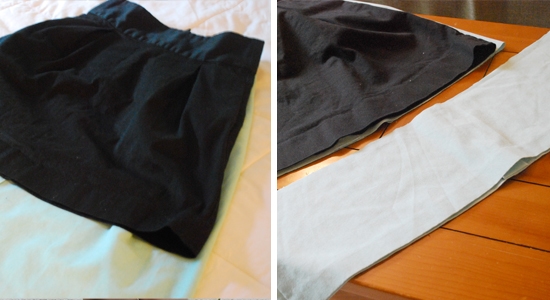
Measure. Start by deciding how short you want your garment to be. Lay the garment out flat and use your measuring tape to measure how much fabric you want to remove. You can also use another garment the length you want to measure, like I did in the photo below. Remember to leave about 1 inch extra for the hem.

Mark and cut. Mark your garment at the desired length and carefully make your cut, remembering to allow for about an extra inch of fabric.
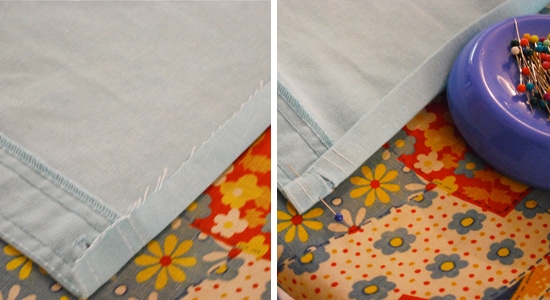
Fold, press, and pin. Fold the hem 1/2 inch towards the inside of the garment and press with your iron as needed. Then, fold your hem another 1/2 inch so the rough cut edge of the fabric is folded inside. Press and pin your hem as you work your way around the bottom of the garment.

Sew and stitch. You’re ready to hit the sewing machine, or the needle and thread. Carefully stitch your hem into place along the edge. If you are sewing by hand, making small stitches will help to create a sturdier hem. Afterwards, remove the pins and press for a finished look.

And there you go! Shortening a hemline is one of the easiest ways to breathe new life into an old garment, like I did with this too-long vintage skirt, for example. You could also try turn a pair of pants into shorts or shorten the sleeves on a top.
What do you think?
Have you ever shortened a hemline on a garment? What is your favorite sewing trick for transforming a garment? Do you have an do-it-yourself project you’d like to see on College Fashion in the future? Let us know in a comment!

Hi I am trying to shorten the hem on a coat. The hem isn’t straight it’s sort of curved and there is a vent in the back. Do I follow the same steps above or is there another way of shortening with a vent?