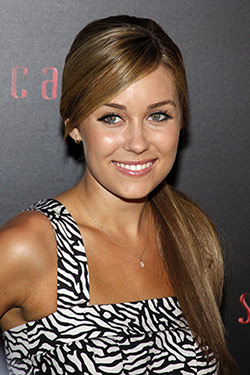
I got the following email recently and thought it would make a great article:
“I am starting college next January and I want to do a Lauren Conrad hairstyle. What are some of her hairstyles so I can get this look?” – Sandra
I like Lauren Conrad‘s many hairstyles on The Hills, and have wanted to write about them for a while, so here goes. What’s great about Lauren’s look is that it’s always changing – it seems like LC does her hair differently in every episode, so there are many ways to get that Lauren Conrad hair for yourself.
Table of Contents
Things To Consider When Styling Your Hair
Before we get into the tutorials, let’s go over a few basics that you need to remember when you’re working with heat and your hair and attempting these styles. If you’re already a hair pro, feel free to skip this section.
- Really Important: ANY and EVERY time you heat-style your hair, be it with a blow dryer, curling iron or flat iron, you need to use a heat protective product first! If you don’t, you’ll fry your hair in the long-term. This is doubly true if you have highlights or use permanent dye. My favorite heat-styling product is Frederic Fekkai Glossing Cream but I have also heard good things about Oscar Blandi Jasmine Oil Serum.
- Second, make sure you buy quality tools to use in your hair. Since a flat iron touches your hair on both sides, there is so much potential for split ends & breakage it’s not even funny. If you invest in a ceramic flat iron like the CHI Turbo Flat Iron or ghd styler you will save your hair from so much damage Similarly, a good quality curling iron will do wonders.
- Third, remember that these tutorials are for styles that are easiest to do if you have medium-length straight/wavy hair like Lauren’s. Those of you with curly hair will need to blow-dry your hair straight before attempting these looks, so they might not be so practical for every day.
Now that you’ve got all that, on to the tutorials…
Celebrity Hair 101: Lauren Conrad Hairstyles Tutorials
Twisted Pullback
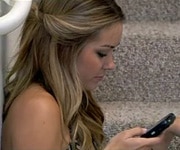
This hairstyle is super-easy to do. All you need are some bobby pins, a little hairspray and a curling iron. If your hair is naturally very curly, you will need to blow-dry it straight first. Don’t worry about getting it perfect, this look works best if your hair has a little wave to it.
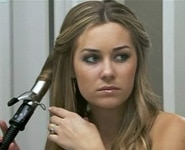
Part your hair down the center and separate hair into sections. I recommend doing the bottom layers of your hair first. To curl, grab a one-inch section of hair, spray lightly with hairspray and then use a large barrel curling iron to make loose ringlets like Lauren’s.
Next, separate one-inch sections of hair from both sides of the front of your face, loosely twist and pull them to the back of your head. Secure with two bobby pins in an X or a cute clip, then spray to hold in place.
Straight Chic Ponytail
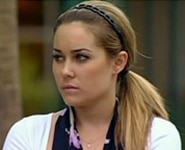
This is similar to the Gossip Girl style chic ponytail that I talked about in the article on quick and easy hairstyles. The difference here is that Lauren’s look is smoother and sleeker, and she sometimes adds her trademark headband or head scarf to finish it off.
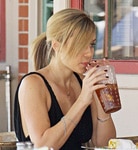
To get the hairstyle, you’ll need a flat iron, brush, elastic and some hairspray. I recommend this look for “second day hair” if you don’t wash your hair daily, but if you do, it will work just as well on clean hair that has been blow-dried straight.
First, apply a heat-protecting product (see “Hair Styling Basics” above.) Next, part your hair to the side if attempting the first look. Don’t worry about a part if attempting the second. Then flat iron your hair in sections starting with the bottom layers until it is pin-straight. Finally, tilt your head back and brush your hair into a ponytail. Secure with an elastic slightly above the nape of the neck.
If you have side bangs like Lauren and want to get her look in the first photo, pull out your bangs from the ponytail and arrange them how you want. If you are going for her second look, just slip on a headband and spray your hair down with some hairspray to secure.
Pin-Straight & Shiny
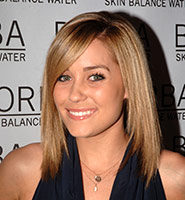
You know Lauren definitely loves this look because we see her wearing it all the time on The Hills and to red-carpet events. Unless your hair is absolutely pin-straight, you’re going to need a good quality flat iron to get this look.
To create this hairstyle, you need a blow dryer, a flat iron, and either hairspray or shine spray depending on how easily your hair stays straight.
Step one is to use a heat-protecting product to damp hair (see “Hair Styling Basics” above.) Then even if you have semi-straight hair, blow it out, aiming your dryer down, NOT up, the hair shaft to create extra-smoothness.
Once your hair is dry, flat-iron your whole head in sections until your locks are pin-straight.
If your hair is naturally wavy and turns back to frizz a few hours after you straighten, you need to finish this look with hairspray. Make sure to get one that doesn’t list water as the main ingredient – these will turn your hair back to waves in an instant.
If your hair is pretty straight naturally or stays straight for a while after you flat iron, use a shine spray to finish the look off. I love Beyond Shine Mist; it makes your hair incredibly glossy!
Wavy With Side-Bangs
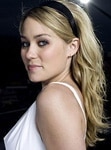
Here’s the look that Lauren wears on The Hills Season 3. If you’ve seen the first episode, it looks like Lauren pretty much wore her hair wavy the whole time she was in Paris. Don’t let her Paris disaster happen to you though: remember to keep your curling iron away from your designer dresses at all times!
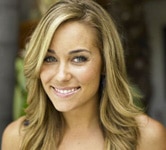
For this hairstyle, you will need hairspray and a large barrel curling iron. If your hair is curly, blow dry it straight first. If your hair is straight or wavy, let it air-dry if possible.
First, part your hair slightly to the side. Starting with the bottom layers, grab 1 to 2 inch pieces of hair, spray each piece with hairspray, then curl. Stop winding the hair around the iron a few inches from the root – you want to keep those semi-straight.
For Lauren’s first look above, section out your bangs from the rest of your hair once you’ve curled everything, then use your curling iron to “wing” the ends out, so the piece moves away from your face. Use a little hairspray to hold.
For Lauren’s second look, slip on a stretchy headband over your finished hair, then arrange the front sections so that your bangs are tucked behind your ear. Again, spray with hairspray to keep everything in place!
What do you think?
So there you have it: Lauren Conrad’s hairstyles in an easy step-by-step guide. If you have any questions about any of this, just leave a comment and I’ll answer as soon as I can! Which hairstyle is your favorite? Would you wear these looks?
Related posts:

i love lauren , and shes my idol , some people say i look like her lmaooo i have no idea why i really love her and yes she does look perfect in every single picture ,, i wish one day i could meet her:). love cs <3
What about her braid?? You know, the classic LC braid: http://www.thehollywoodgossip.com/images/gallery/lauren-conrad-love-me-eyes.jpg
I went to the salon before a holiday dance and they did it PRETTY WELL, but not exactly and I DEFINITELY don’t know how to do it myself. Thanks!
LAUREN CONRAD !!