
I forget everything unless it’s been written down. If you’re anything like me, you rely dearly on your notes to get you through the academic rigor that is college.
You’ve probably seen the pretty notes floating around the “studyspo” tag on Tumblr or in Buzzfeed listicles. Pretty notes are great, however I wanted to create a system that was:
- Lightweight
- Inexpensive
- Minimalistic
Today, I’m sharing my personal note-taking system. (Get ready: It’s long and extremely detailed!) I’ll be covering how to:
- Take lecture notes
- Outline textbook reading assignments
- Review both sets of notes and practice the information
- Archive everything.
Read on for my top note-taking tips and a step-by-step guide to organizing and getting the most out of your notes.
Table of Contents
Supplies
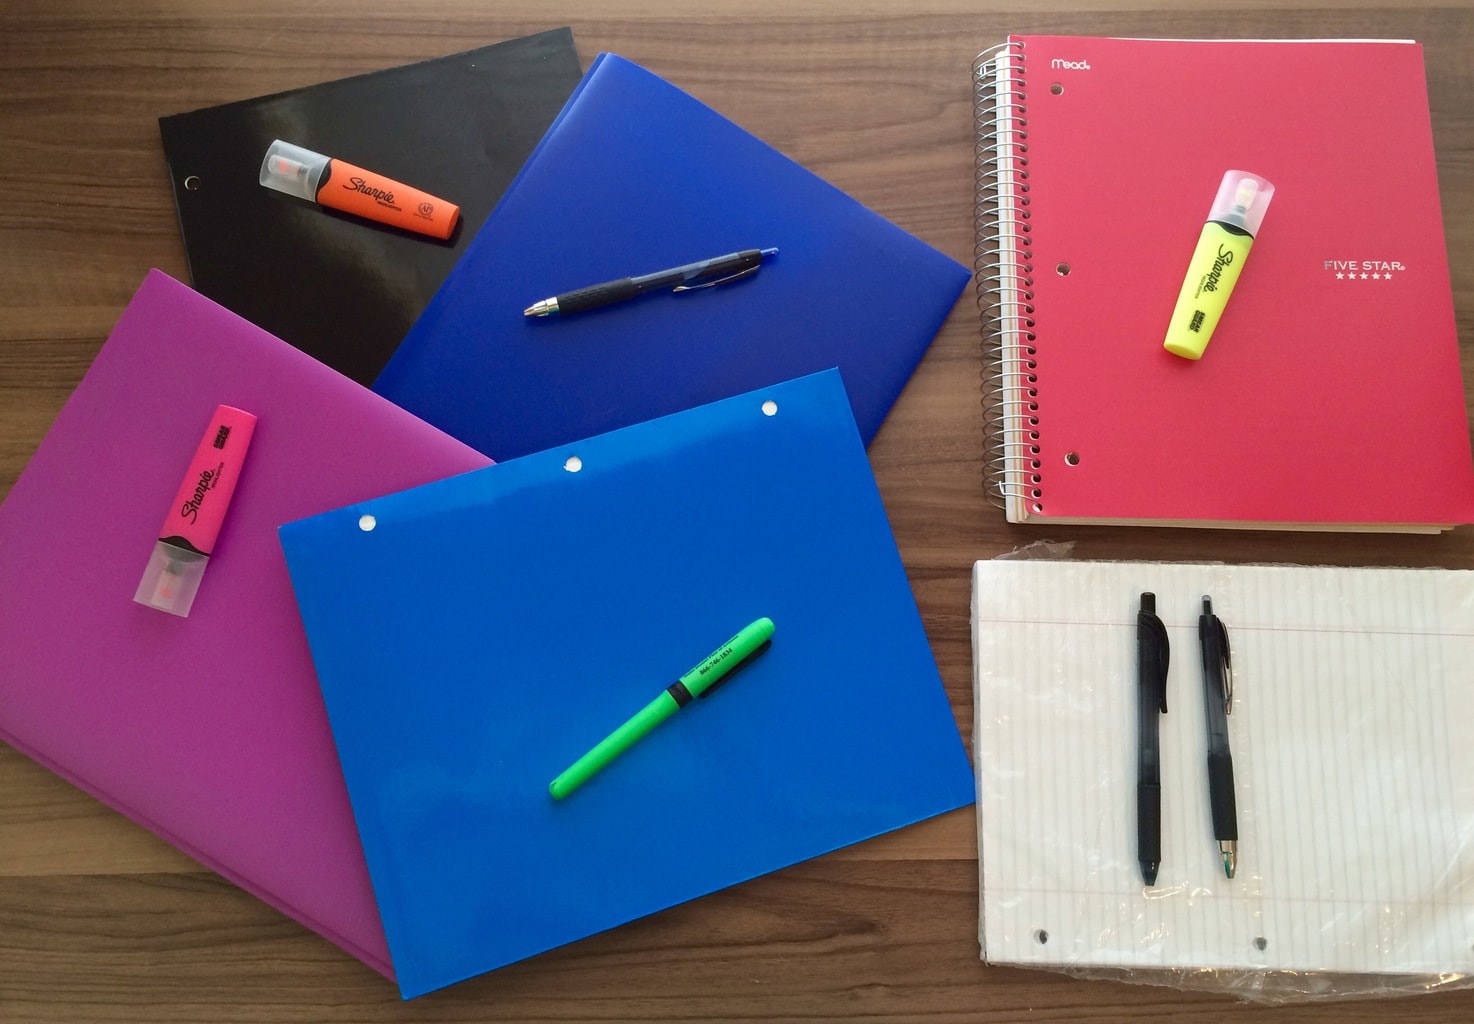
First things first, what supplies should we use? Here’s what I recommend:
- 1 folder per class
- Packs of lined loose-leaf refill paper
- 1 colored pen or highlighter (excluding yellow) per class
- 1 yellow highlighter
- Black pens
- A multi-section notebook (4-section if you have 4 classes, etc.)
- Not pictured: manila folder per class + post-it notes
I’ll splurge a bit on the black pens for writing fluidity (favorites include: Signo’s Uni-Ball and Pentel EnerGelX) and the multi-section notebook for durability (Mead Five Star all the way).
I stock up during back-to-school sales and at dollar tree stores. Everything combined normally costs me about $10-20 per semester.
I try to match the folder colors with the highlighters/pens according to my whims or because the colors actually match:
- Black-orange because Halloween and it’s my most terrifying class.
- Purple-pink? Close enough.
- Dark blue-blue: Yup. Something finally matches.
- Blue-green reminds me of Crush from Finding Nemo/Dory and that amuses me so there you have it. (I’m easily entertained).
Lecture Notes
Headers
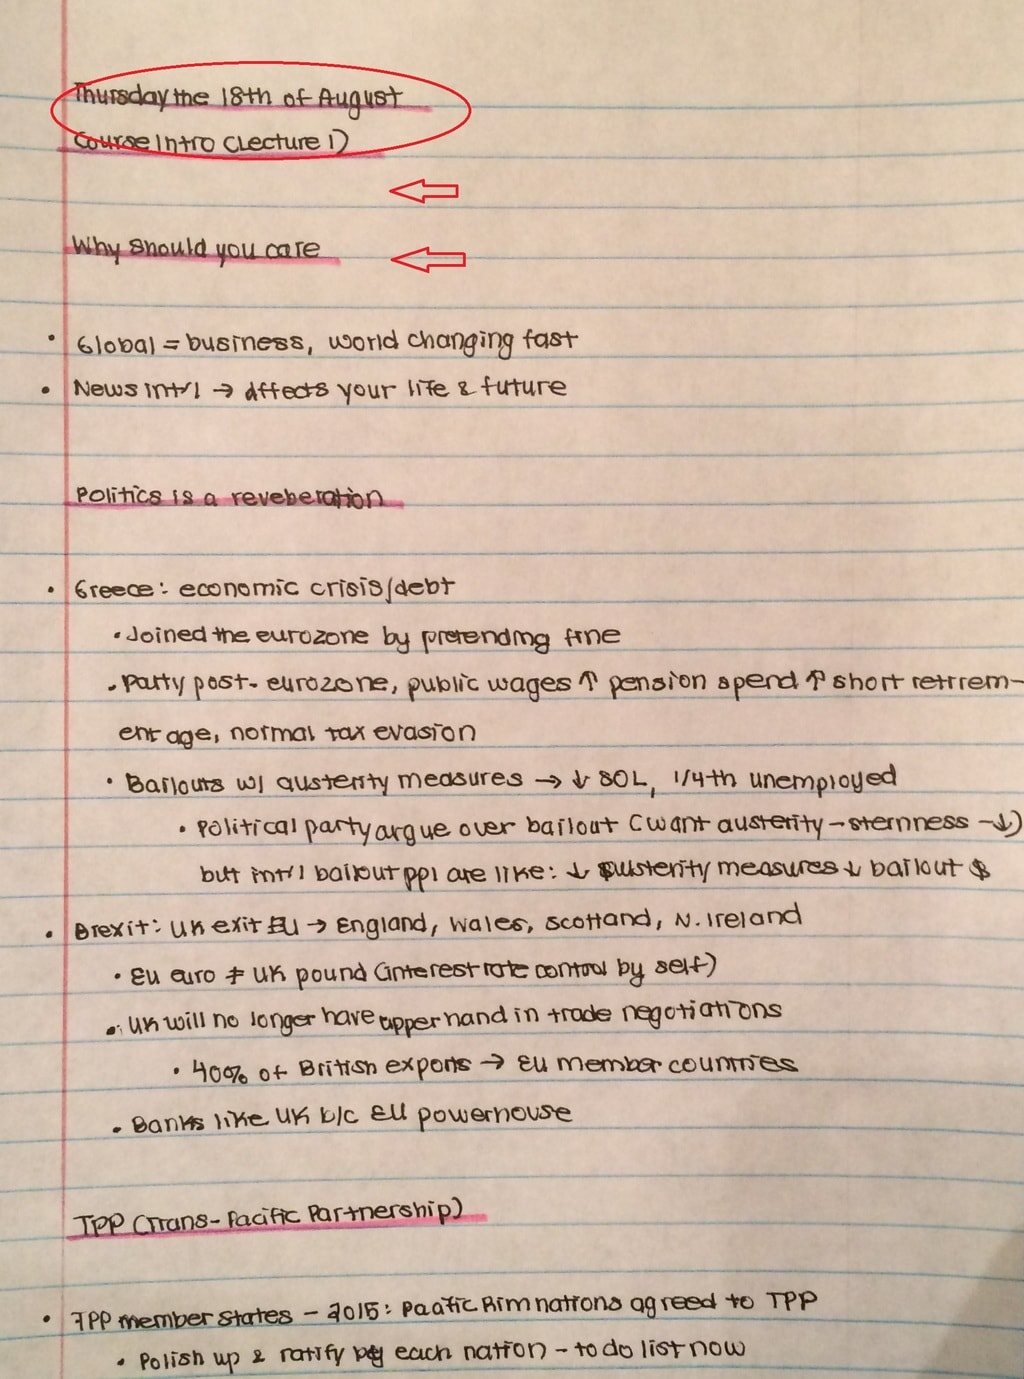
I put the date on the very first line of the page. The second line is for the Lecture Topic and number. If the lecture is a continuation of a previous lecture topic and new material, I just write: Course Intro Con’td + CH 2 Systems (Lecture 2).
I skip one line between each header and other headers or the bullet points.
I underline the headers with the color designated for the class.
Since I’m using loose-leaf refill paper, I number the pages in the upper left hand corner.
I normally write on one side of the page during lecture for speed and easy flip-through.
Notes
I don’t bother with fancy note-taking formats during lecture. Bullet points outside the margin indicate main points and then details are just further indented bullet points.
I use arrows, colons, and dashes for cause/effect relationships, definitions, and events/explanations.
Margins
I make copious use of the side margins:
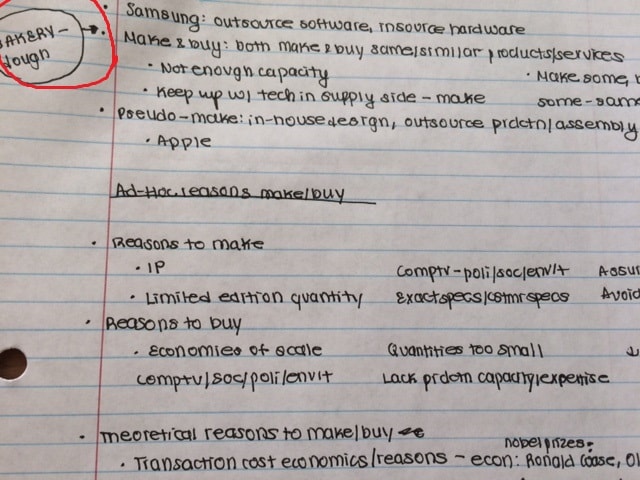
Circled items with an arrow = my own thought. Any metaphors or examples I made up.
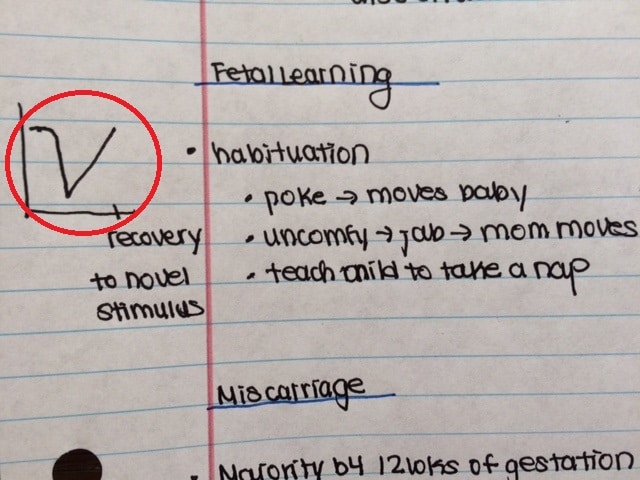
All diagrams are placed in the margins next to the bullet point notes.
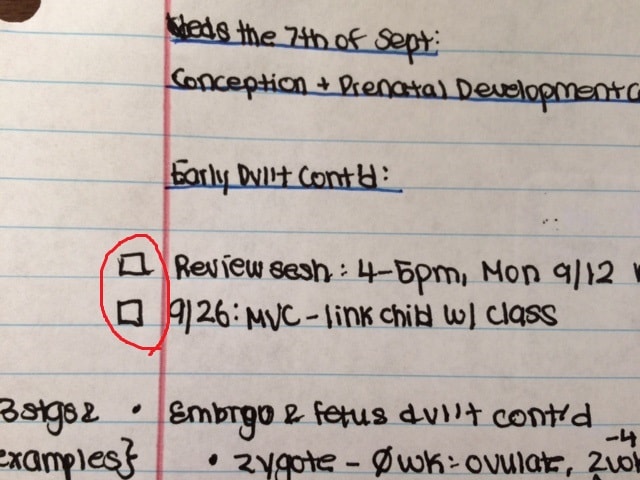
Checkboxes are for house-keeping. The professor goes: Hey! There’s a review session/assignment/exam coming up, I’ll throw the reminders in my notes with checkboxes for follow-up later on.
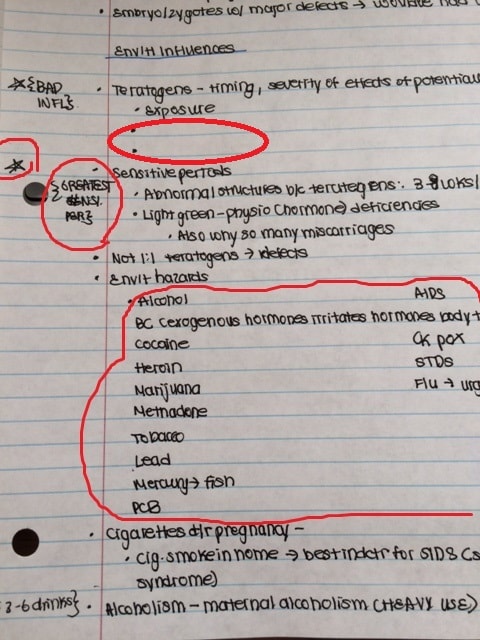
Stars indicate important information that will be on the test. The professor usually straight-up tells you that XYZ might be on a test or will repeat themselves.
Brackets are for:
- Off-hand comments from the professor
- Funny stories in doodle form related to the bullet points
- Interesting details that won’t be tested on
- Titles of important charts in the slides (usually with a star to separate it from the other bracket usages)
They’re good memory triggers and a reminder that lectures can be fun.
Any lists of information get one bullet point for the first item and then no other symbols the entire way down. This differentiates it from the normal main topic/detail bullet points and helps draw my eye to the list.
If I miss something, I’ll add the bullet points and/or skip lines so I remember to come back to it later. I usually don’t underline headers during class or I’ll just underline it in black to go over later.
I normally fill in missing information from my notes within 24 hours of lecture. I underline headings with color. I also add colons to headings to show that it’s a Main Heading and that following headers without colons are Sub-Headings.
Ta-da! Staple all pages together and done. I usually have 1 page every 15 minutes of lecture, so a 75 minute lecture will produce 5 pages of lecture notes.
Textbook Reading Notes
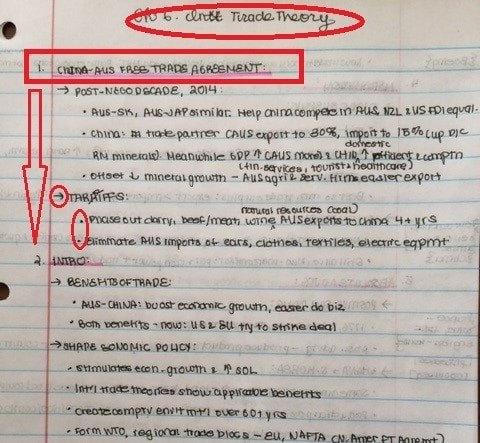
My textbook notes tend to be more brief than my lecture notes. There’s so much filler in reading assignments, meanwhile everything is potentially important in lecture notes.
I usually outline my reading notes after lecture (which isn’t the typical advice) because a lot of the textbook material is covered already in lecture.
I write on both sides of the loose-leaf page and I don’t skip lines for textbook notes since I won’t have to fill in any information later.
Headers
I write the chapter number and title in cursive at the center of the top margin.
On the second line, I’ll write out the heading capitalized. All Main Headings get a full number in the side margin and underlined in their class color. Any subheadings would go: 2.1 in the margin with the same capitalization and color underlining.
Between each heading, I leave 8 lines of space.
I fill in all the headings first.
Notes
I’ll skim each headlined section in the book first to see how I should allocate the 8 lines for the Main Topics and bullet points.
All Main Topics are capitalized and given an arrow symbol. The notes are in bullet points and sub-notes have dashes.
Margins
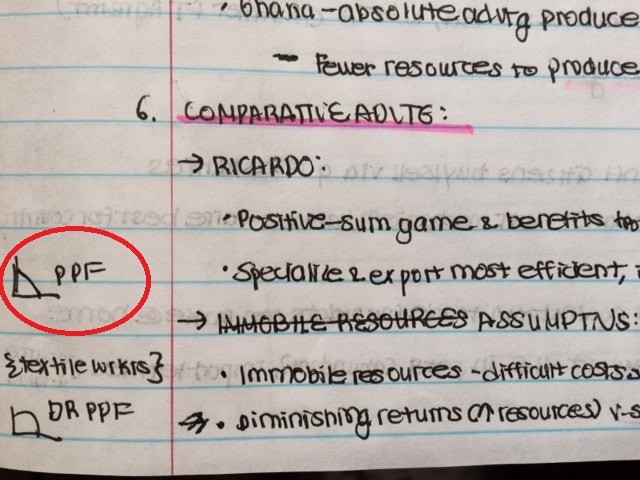
Again, diagrams are placed in the side margins.
As you can tell, my notes aren’t perfect. I sometimes miscalculate how much space I want to dedicate to each Main Topic and end up scribbling things out and having to use carrots to insert in information. That’s fine.
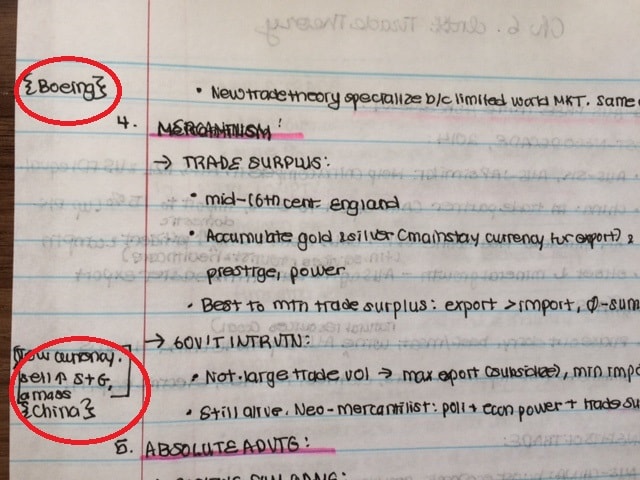
I use squiggly brackets to connote in-text examples of the main points and normal brackets for facts.
I normally have 1 page of textbook notes for every 6-7 pages of reading. So a 27 page chapter means 4 pages of notes and takes about 2 hours to complete (25 minutes per reading page).
I staple my textbook notes together and place them in the class folder with my lecture notes.
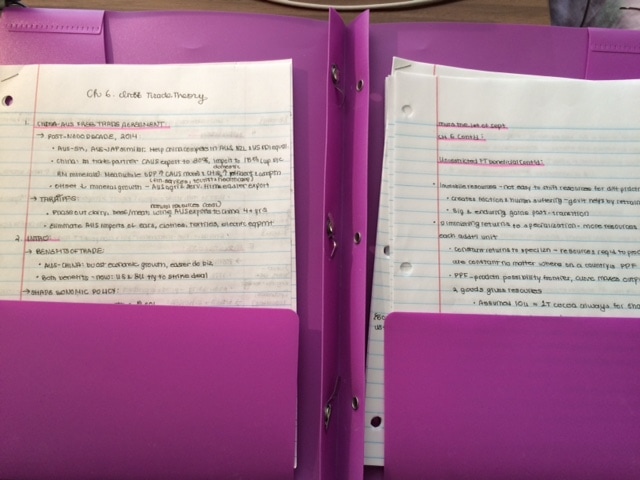
Reading notes on left, class notes on right. Most recent notes at the very top.
This system simplifies my life to a great degree. On a typical day, I typically only have my class folders for the day, a pack of refill paper, pens and highlighters, and a mini stapler in my backpack. My back thanks me.
Reviewing and Practicing
It’s all over, right? Nope. Still gotta test yourself on the information. Notes are useless if you aren’t reviewing them and retaining the information. You don’t want to take notes three weeks before a test and forget all of the information by test day.
Break out that yellow highlighter and multi-section notebook. It’s time to review and practice.
Review
Reduce
I synthesize each set of lecture notes and reading assignment notes down to 1-2 pages. All of the note reductions are done in syllabus order in the multi-section notebook.
The information reduction is to emphasize:
- Any starred notes
- Anything that confused me because it’s just a natural law of college that anything that confuses you will most definitely be on the test
- Content that was also covered by problem sets/quizzes/etc.
- Important things that you think you will easily forget about
Done? Nope. One more reduction!
Take out your handy dandy syllabus and class folder and see which lectures line up with each chapter. Example: lectures 1 (8/18) and part of lecture 2 (8/23) went with Chapter 1. It’s a good thing you’ve dated and labeled every lecture and titled your textbook notes.
I reduce the integrated chapter and corresponding lecture notes to 1 page. This is my pseudo-crib sheet. It has everything I must know for the test, what I still need practice on, and what I need to know by heart.
Notes
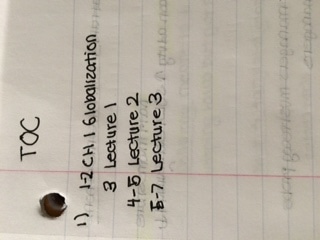
I have a short Table of Contents on the first right-page before the reductions start on the first left-page. Group number, page number, then item.
I start lecture or reading reduction notes on the left page so I can see the entire layout in case it ends up being 2 pages.
My lecture and reading reduction notes are pretty plain. I use the same format for both of them. I write in semi-full sentences and try to rewrite everything into my own words.
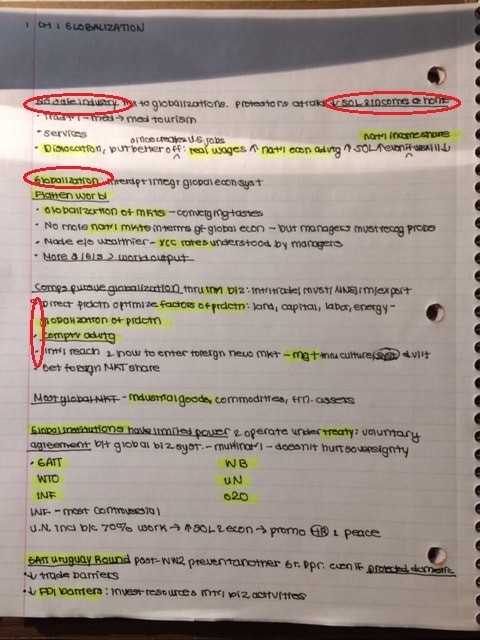
I use a yellow highlighter for keywords. I underline 1-2 main concepts per paragraph in black pen. I use bullet points. I use the same one bullet point/none format for lists here, too.
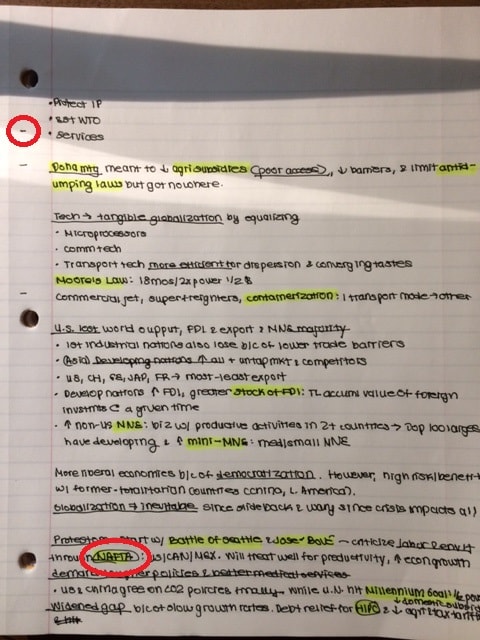
I circle acronyms I have trouble remembering that I can find in my lecture/textbook notes. I put little margin dashes next to information I need to do some more research on in order to understand and remember it better.
I still use arrows for cause/effect relationships, colons for definitions, and dashes for events/explanations. I just try to keep the reduction notes very clean looking.
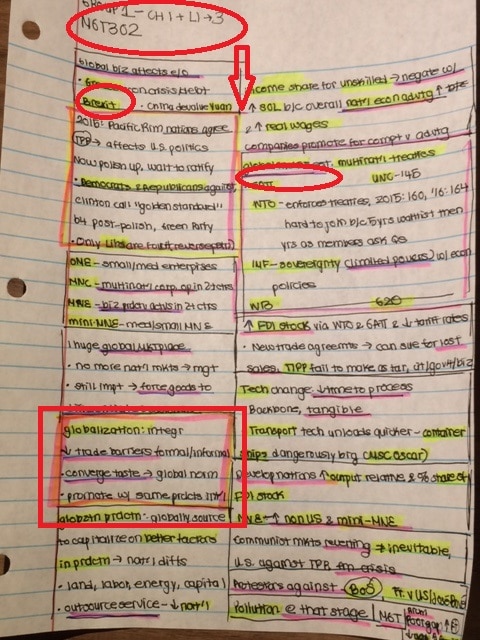
My 1-page integrated notesheet uses a similar format. I write the integrated notes on one page of blank lined loose-leaf paper so I can flip through the notebook without wanting to cry. I fold the paper in half and use 2 columns to fit in the most material in the smallest amount of space. I write the group number with matching lecture/class numbers and class name.
I box information in black and outline the most important boxed information (2-3 boxes max) with the class color. I underline 2-3 main concepts per box in the class color as well. Keyword highlighting in yellow, acronym circling, bullet points, arrows, colons, etc. all stay the same.
Practice
When it’s time to prepare for the test, I take out one page of blank loose-leaf paper and try to replicate my pseudo-crib sheet as best as I can without notes/textbook.
Afterwards, I either cheer (which is never because I always forget something) or start drilling concepts with mind maps, flashcards, and/or going to review sessions/office hours. Then another practice sheet. Then another.
I put my practice sheets into the folders of the multi-section notebook.
Archiving
After an exam is over, I’ll take all of my lecture and class notes, integrated notesheet, along with my practice papers and place them into a manila folder. The manila folder is labeled with the class name. Then I’ll stick a post-it note with “EXAM X” on top of the materials. This helps keep my regular class folder light and everything organized, especially when cumulative finals roll around.
And there you have it! My comprehensive guide to note-taking! Feel free to ask me more questions about my system or for more pictures/examples in the comment section.
How do you take notes?
Do you have a separate system for lectures and textbook readings? What supplies do you use? How do you store everything? How do you archive old notes? What do you do to review and practice the information?

Thanks for this great explanation – I am going to show this article to my students as I’m sure it’ll help them a lot.
My system is a little similar. I handwrite everything because it seems like I won’t remember it otherwise.
First I usually read or skin the text before class, then in class I take “messy” notes (use abbreviations, shorthand, etc.) It doesn’t matter about layout, just content. After class I sit down and divide my notes into sections and sub-sections until I’m satisfied with the organization (this helps because I usually end up reading the info more than once). Then I copy it over into my notebook in a neat, easy to read, color-coded system (green = places, blue=dates/people, etc.). I’m a visual learner, so having it neat and easy to study/recall makes things so much easier. Last I read over my neat, organized, condensed notes and voila!
Color-coding really does help. I like pink = questions, orange = examples, and yellow = vocab.